Rainmail Server, when implemented as a Firewall, can control all network traffic from LAN to Internet and vice-versa. For this, the clients need to be told to direct all traffic to the Internet through Rainmail Server. This can be done by setting Rainmail Server as Gateway in the client machine.
In this section, you will see how DNS can be set as Rainmail Server for Windows 8. For other Operating Systems, a similar set of steps will be required.
- Click on the Search icon on your Sidebar and type control panel. The Control Panel link is displayed in the search results.
- Navigate to Control Panel --> Network and Sharing Center
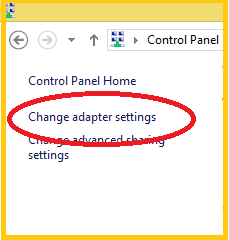
- The following screen appears. Click on Change adapter settings (indicated by the red oval)
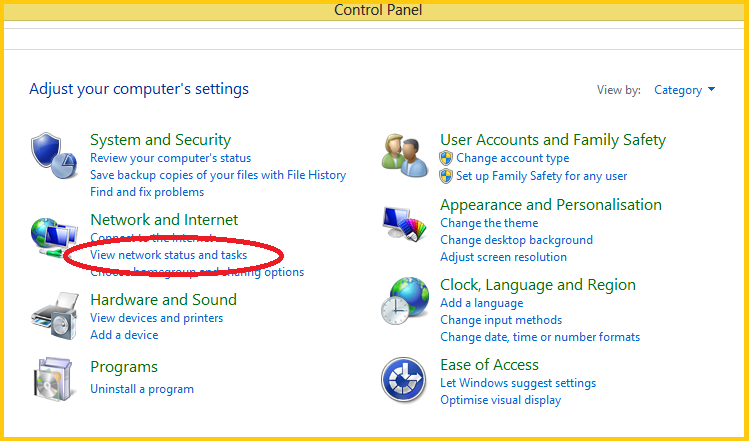
- The Control Panel appears as below. Click on View network status and tasks (indicated by the red oval)
- The following screen appears. Click on Change adapter settings (indicated by the red oval)

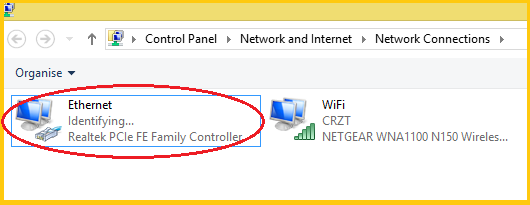
- The following screen appears. Right click on Ethernet (indicated by the red oval) and select Properties
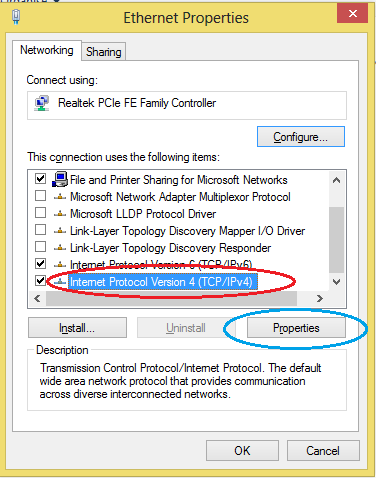
- The following dialog appears. Select Internet Protocol version 4 (TCP/IPv4) (indicated by the red oval) and click on Properties (indicated by the blue oval)
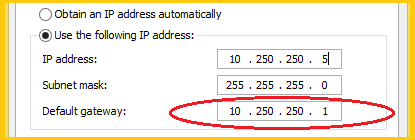
- That will bring up the dialog containing the following part. Enter the IP address of Rainmail Server in the edit box corresponding to Default Gateway (indicated by the red oval)
- Click Ok to close all the dialogs
- The Client Machine is now configured to use Rainmail Server as network gateway


