Rainmail Server User Guide
ContentsIndexHome
PreviousUpNext
A/V Conferencing-Whiteboard

White board provision in Rainmail A/V Conference offers a shared white board. Whatever appears on the white board appears for all participants in the conference. A conference room can have multiple white boards. Content of White board can be drawn using the tools provided or populated from pre-existing presentation material like a Power point presentation or a PDF/Word/Excel document. 


The table below gives a summary of some key features and includes instructions to use the same.

Sl. No. 
Indicated by 
Feature 
Detailed description 
 
Clear White board 
This icon helps clear the contents of the current White board and start on a clean slate. To clear the White board,
  1. Click on the icon.
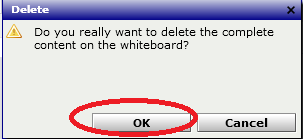
  2. The following dialog is displayed
  1. Click on OK button in above dialog.
  2. The White board is cleared
 
 
Save and Export 
This helps store current White board contents into a file. To save the contents,
  1. Click on Save and Export icon.
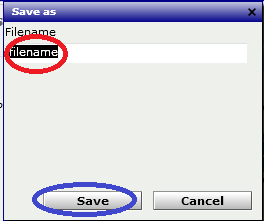
  2. Following dialog appears.
  1. Enter the file name to save as in the Edit box (indicated by Red Oval above) and click on Save button (indicated by Blue Oval).
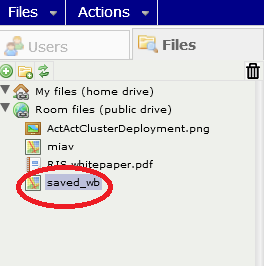
  2. The file is saved in the Server and can be seen in the File Manager as shown below (as indicated by Red Oval)
 
 
Undo 
Clicking this icon un-does the last operation in the White board. 
 
Select object 
Clicking this helps user to select an object in the White board. Once selected, the Object can be re sized, moved or deleted. 
 
Pointer 
This is a pointer that can be used to direct attention of participants to a particular object or location of the screen, during the presentation. 
 
Write text 
This feature helps user to write text in the White board. To write text,
  1. Click on this icon.
  2. Draw a rectangular text box in the region where the text is to be written.
  3. Input text using Keyboard.
 
 
Paint 
Users can do free hand painting in the White board as follows:
  1. Click on this icon
  2. Set thickness as well as Color of the paint using the Properties tab at bottom of White board.
  3. Draw by dragging the mouse while keeping the Mouse button pressed.
 
 
Draw line 
Users can draw lines in the White board as follows:
  1. Click on the Draw Line icon.
  2. Move mouse to starting point of the line
  3. While keeping the mouse button pressed, move the mouse to end point of line
  4. Release the mouse button
  5. A line will be drawn from start to end point.
 
 
Draw Underline 
Users can highlight (or Underline) areas of the White board as follows:
  1. Click on the Draw Underline icon.
  2. Move mouse to starting point
  3. While keeping mouse button pressed, move mouse to point till where the highlighting needs to be done
  4. Release the mouse button
  5. All the area between start and end points will be highlighted.
 
10 
 
Rectangle 
Users can draw rectangles in White board as follows:
  1. Click on the Rectangle icon.
  2. Move mouse to the position of top left corner of the rectangle to be drawn.
  3. While keeping the mouse button pressed, move mouse to the bottom right corner of rectangle to be drawn.
  4. Release the mouse button
  5. A rectangle will be drawn between these two diagonal points.
 
11 
 
Ellipse 
Users can draw Ellipse/circles as follows:
  1. Click on Ellipse icon.
  2. Move mouse to one point in Circle/Ellipse to be drawn.
  3. While keeping the mouse button pressed, move mouse appropriately to get the correct Circle/Ellipse.
  4. Release the mouse button
 
12 
 
Arrow 
Users can draw arrows as follows:
  1. Click on Arrow icon
  2. Move mouse to the starting point of arrow.
  3. While keeping the mouse button pressed, move mouse to the point to which arrow is to be drawn.
  4. Release the mouse
  5. Arrow from starting to end point will be drawn
 
13 
 
Cliparts 
Rainmail includes a set of clip arts which can be inserted into the White board as and when required. To insert,
  1. Click on the Cliparts icon.
  2. Choose the clip art from the displayed list.
  3. Move mouse to the point where the clip art is to be displayed.
  4. Click on the position.
  5. Clip art will be inserted at current position in White board.
  6. The picture can be re sized as required
 
14 
 
Zoom in/out content of White board 
Content of White board can be zoomed in/out for better viewing. This is done by using the Slider in the top right hand corner of White board.
A value of less than 100 will shrink the contents (zoom out) while a value above 100 will expand the contents (zoom in) 
Copyright (c) 1999-2014. Carizen Software (P) Ltd. All rights reserved.
What do you think about this topic? Send feedback!