In this section, the exact steps to configure Rainmail Email Server on Windows Live Mail 2012 running on a Windows 8 System are given.
- Run WLM 2012 by going to the Search icon on your SideBar and typing windows. From the search results click on Windows Live Mail
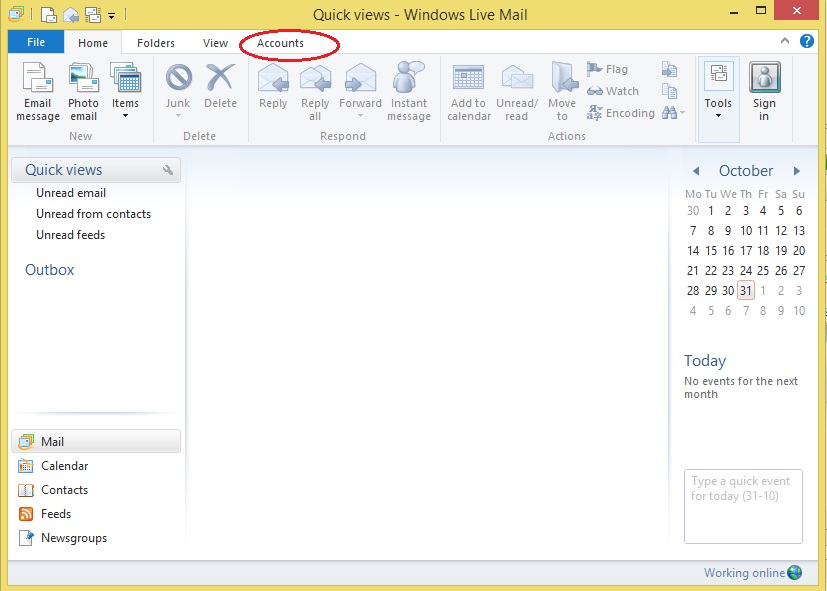
- The following window appears. Click on Accounts (indicated by the red oval)
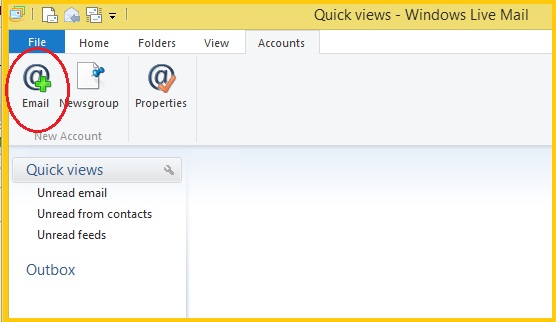
- The following screen appears. Click on Email (indicated by the red oval)
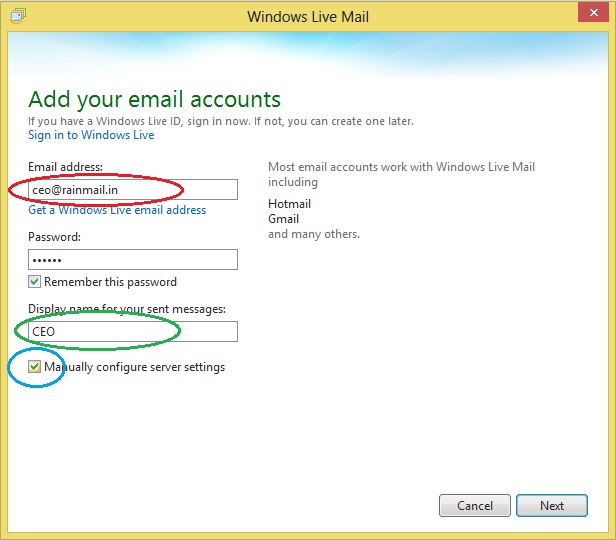
- The Add your email accounts dialog appears.
- In the edit box under Email address: (indicated by the red oval), type your full email address
- Enter the corresponding password in the Password field
- Enter your user name in the Display name for your sent messages field (indicated by the green oval)
- Check the check box next to Manually configure server settings (indicated by the blue oval)
- Click on Next button
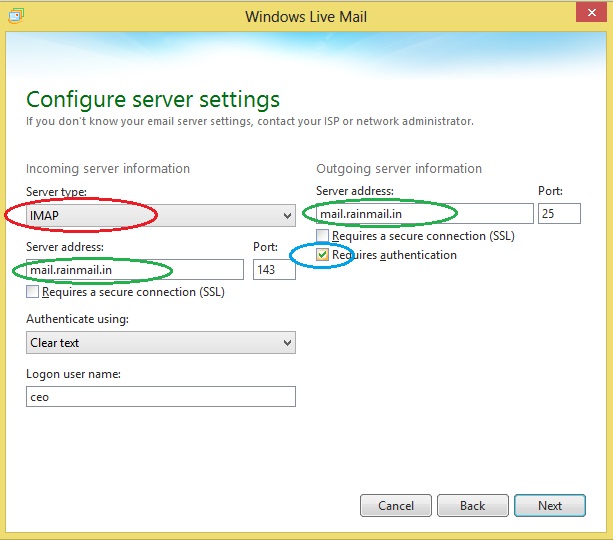
- The Configure server settings dialog appears.
- From the drop down menu listed under Server type: (indicated by the red oval) select IMAP
- In the edit boxes under Server address (indicated by the green ovals), type the IP address (or) Host name of your Rainmail Server
- In the Logon user name field, type your user name
- Check the check box next to Requires authentication (indicated by the blue oval)
- Select Next
- The following confirmation page appears
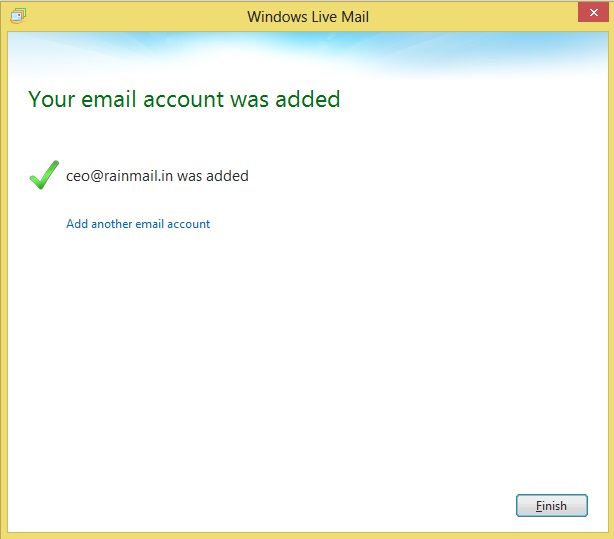
- Click on Finish to complete the process
- The first time the program is started, Folders from the server are downloaded and following dialog is displayed
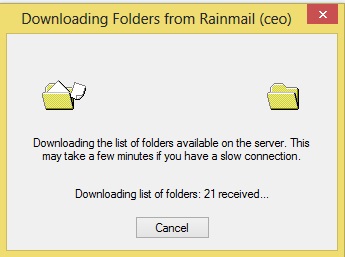
- Once the download is complete, emails will be available in Windows Live Mail Client and can be used for sending/receiving emails


